AWS Cross-Account CLI/API Authentication with MFA - Part 1
Or How I Lost My Hair So You Don't Have To - The Road To AssumeRole
Part 1 - The Road To AssumeRole
You’re probably here because much beyond a single AWS account and IAM user with an AccessKey/Secret, using the AWS CLI and API/SDKs can be incredibly frustrating, much less trying to do so securely with MFA. Documentation on the subject is thin, dispersed, and confusing.
Story:
Using an IAM user account, authenticate using AccessKey/Secret and MFA to securely gain access to resources in this and/or other AWS accounts, for use by the standard CLI tools and/or SDKs (Python scripts via boto3, etc).
(A federated auth version of this post will come another time, but some of this may be applicable)
A Quick Note:
Before we get too far, I must warn you that much of this isn’t something a (IAM) user can do on their own. All methods require some level of (AWS) account configuration that will require administrative access. Like most of AWS, none of it comes out of the box. This article will probably be more useful to AWS account administators than their users.
Also, there are a few ways to go about this with various pros and cons to consider. I’ll walk us through the path from the simpliest to the most involved.
I’m also going to assume some significant familiarlity with AWS IAM and policy language already. This is a fairly advanced topic so consider this blog post like a “400 level” session at re:Invent.
Ok, on with it then.
Problem 1
The first problem we have is that out of the box IAM AccessKey authentication does not itself support MFA. The AccessKey/Secret is basically a glorified Username/Password with all that implies.
The AssumeRole API however, does support MFA.
Additionally the latest CLI/API versions support using AssumeRole
(via role_arn) and MFA (via mfa_serial) options in your
~/.aws/config file. This avoids needing helper scripts
which is great! -Or would be if it was true, but it’s only partly true
(more on that later).
Solving for Problem 1
We’ll create a Role with our user’s actual permissions in it and we’ll give our IAM user only the permission to AssumeRole into that new Role.
To ensure MFA we’ll add Conditions to both the user’s policy and the role’s access policy. Strictly speaking we only need the condition on one or the other to enforce MFA, but doing both is a good check against mistakes by other lazy admins in the future.
So the user’s process:
- The user uses AccessKey/Secret credentials to call the AssumeRole API with an MFA parameter
- AssumeRole returns temporary credentials
- User uses those temporary credentials to access account resources
The standard tools (CLI, SDK, etc) will manage this process for the user, but we will need to configure them.
I’ll assume you’ve created your IAM user, created AccessKeys for them, and added an MFA device to their profile. I’ll further assume you’re using token-based MFA and not SMS text message based MFA. -SMS MFA is both insecure and annoying anyway (think airplane wifi but no cell/sms reception), so it’s better to just avoid it.
Your user will get a Policy that gives them only access to AssumeRole into our TestRole and only if they have provided MFA. For now this is in the same account, although it works much the same for cross-account as we’ll see in part 2.
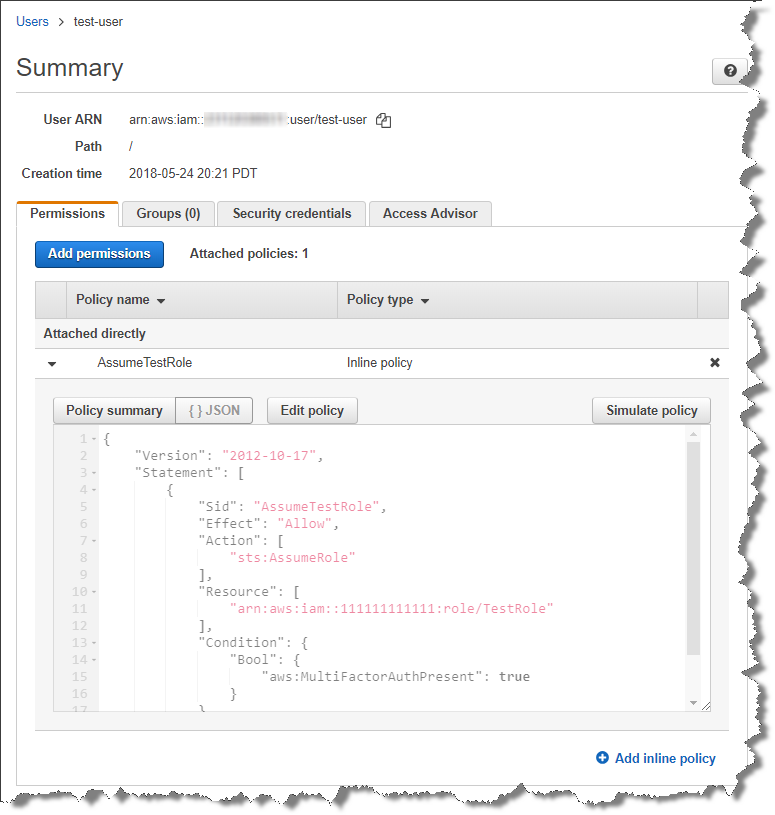
The IAM User’s Policy: (managed, inline, inherited from a Group, it doesn’t matter)
{
    "Version": "2012-10-17",
    "Statement": [
        {
            "Sid": "AssumeTestRole",
            "Effect": "Allow",
            "Action": [
                "sts:AssumeRole"
            ],
            "Resource": [
                "arn:aws:iam::111111111111:role/TestRole"
            ],
            "Condition": {
                "Bool": {
                    "aws:MultiFactorAuthPresent": true
                }
            }
        }
    ]
}
In the Console it’d look something like this:
For our TestRole we’ll give it whatever permissions we’d like (the SecurityAudit policy is a good option for testing) and give it a Trust Policy that grants this same account access, but only if MFA is supplied:
{
  "Version": "2012-10-17",
  "Statement": [
    {
      "Effect": "Allow",
      "Principal": {
        "AWS": "arn:aws:iam::111111111111:root"
      },
      "Action": "sts:AssumeRole",
      "Condition": {
        "Bool": {
          "aws:MultiFactorAuthPresent": "true"
        }
      }
    }
  ]
}
Now that we have our User and Role setup our User will need to do a bit of
manual setup in their ~/.aws/config file.
I’m avoiding the “default” profile intentionally: Once we’re using advanced access like MFA or cross-account roles the unnamed default just leads to confusion.
For this our non-MFA profile name will be login and the profile we’ll access resources with will be cheddar. The chedder profile will simply be a mnemonic for the 111111111111 account that has our IAM user. As we get into cross-account we’ll be switching to the brie and havarti account profiles, etc.
Oh, and our IAM user name here is test-user.
[profile login]
region = us-east-1
output = json
[profile cheddar]
source_profile = login
role_arn = arn:aws:iam::111111111111:role/TestRole
mfa_serial = arn:aws:iam::111111111111:mfa/test-user
role_session_name = test-user
region = us-east-1
output = json
Take a close look at that cheddar profile. The source_profile tells it to
use the login profile for base credentials (our AccessKey/Secret, stored in ~/.aws/credentials). The
role_arn tells it we’re going to AssumeRole rather than a direct
authentication. And mfa_serial tells it to ask for and include our MFA
token with the request.
The CLI will use that information to request temporary credentials as needed
and store them under ~/.aws/cli/cache for future use.
Please note the role_session_name in the config above. While not
required, please be kind to your admins and set it to your username or
something useful. Failing to do so will cause it to be something like
boto3session-Giberish and make digging through CloudTrail
logs a PITA.
-It doesn’t actually hide your identity anyway as the logs are still
kept detailing who called AssumeRole in the first
place, so it’s just annoying.
The login profile will need our user’s AccessKey and Secret, so we’ll set them in the usual way:
$ aws --profile login configure
AWS Access Key ID [None]: AKIAIJPDTFUD2XFAL4SA
AWS Secret Access Key [None]: 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
Default region name [us-east-1]:
Default output format [json]:
$
Ok, lets take it all for a spin. First the login account, we’ll ask it who we are:
$ aws --profile login sts get-caller-identity
{
    "Account": "111111111111",
    "UserId": "AIDAI2UVTQFJ4465ZUQKK",
    "Arn": "arn:aws:iam::111111111111:user/test-user"
}
Looks good. We’re an IAM user account so our Arn reflects that. Lets check our access by trying to list all users.
$ aws --profile login iam list-users
An error occurred (AccessDenied) when calling the ListUsers operation: User: arn:aws:iam::111111111111:user/test-user is not authorized to perform: iam:ListUsers on resource: arn:aws:iam::111111111111:user/
Still looking good. We got rejected with this non-MFA login which is what we want to happen.
Lets try to AssumeRole without MFA:
$ aws --profile login sts assume-role --role-session-name test-user --role-arn arn:aws:iam::111111111111:role/TestRole
An error occurred (AccessDenied) when calling the AssumeRole operation: User: arn:aws:iam::111111111111:user/test-user is not authorized to perform: sts:AssumeRole on resource: arn:aws:iam::111111111111:role/TestRole
Perfect, our MFA Condition restrictions are working.
Now lets take a look at the cheddar profile:
$ aws --profile cheddar sts get-caller-identity
Enter MFA code for arn:aws:iam::111111111111:mfa/test-user:
{
    "Account": "111111111111",
    "UserId": "AROAJFU3CP37FC3ZZ77CC:test-user",
    "Arn": "arn:aws:sts::111111111111:assumed-role/TestRole/test-user"
}
Notice how it prompted us for our MFA token. This is due to the
mfa_serial value in our ~/.aws/config for this profile. We can see from
the Arn this time that the identity is an assumed-role rather than an
IAM user arn.
Lets try that iam list-users command again, this time with our cheddar
profile:
$ aws --profile cheddar iam list-users
{
    "Users": [
        {
            "UserName": "test-user",
            "PasswordLastUsed": "2018-02-13T01:12:29Z",
            "CreateDate": "2018-01-29T23:58:26Z",
            "UserId": "AIDAI5VR6DPR4O4MI7BDE",
            "Path": "/",
            "Arn": "arn:aws:iam::111111111111:user/test-user"
        }
    ]
}
The command succeeds.
Notice this time we are not prompted for our MFA token. This is because our temporary credentials are still cached from the first use. The credentials will expire in an hour after which point we’ll be asked for them again.
This is where we talk about our first Cons from using this approach:
Cons:
-
An hour expiration can be very annoying for long running scripts that will simply stop every hour to prompt for MFA again.
-
It’s also a hard expiration not an inactivity timeout, so it doesn’t matter how actively you’re using the session. To make matters worse, at the time of this writing you can not request longer lived credentials via this config file only method, even if you’ve configured your Role to allow for longer lived credentials.
-
Even that one hour reprieve only works for the CLI. If for example, you’re running Python scripts using the boto3 SDK, those cached credentials are neither created nore used. The MFA config still “works” the same, but the temporary credentials are not cached (to disk) and so you’ll be asked for MFA over and over again each time you run your Python script. This despite the fact that the AWS CLI is built on the boto3 SDK and largely uses the same code for config files and authentication handling. Personally I consider this a bug, but it’s documented so I guess we have to call it a mis-feature. :/
To demonstrate this bug feature we’ll run the same list_users() API
call we made above, only this time as a one-liner of Python code using the
boto3 SDK:
$ export AWS_PROFILE="cheddar"
$ python -c "import boto3; print(boto3.client('iam').list_users()['Users'])"
Enter MFA code for arn:aws:iam::111111111111:mfa/test-user:
[{u'UserName': 'test-user', u'Path': '/', u'CreateDate': datetime.datetime(2018, 3, 26, 21, 37, 3, tzinfo=tzutc()), u'UserId': 'AIDAI2UVTQFJ4465ZUQKK', u'Arn': 'arn:aws:iam::111111111111:user/test-user'}]
Each time we run the command we’re prompted for our MFA token. Imaging if you’re trying to develop a utility script in Python, you’d go mad re-entering your MFA every 30 seconds. And you can’t use the same MFA twice, so you have to wait that 30 seconds to get a new token each time.
Pros:
So what are the pros?
1: It’s config only from the user’s perspective which makes it much easier to setup and support. No need for helper scripts.
This can’t be understated: As an admin supporting users, I can tell you
it’s a huge pain to distribute helper scripts to everyone and hold their
hand through setting them up and using them. Even “Senior Developers”
frequently can’t figure out to set their bloody PATH correctly. And
if/when you need to distribute an update to that helper script…lordy!
Keep in mind too, that you’ll need to also distribute the runtime (Python,
Ruby, etc) for whatever language your script uses along with the SDK…and
manage those updates too.
2: I wrote “pros” plural, but damned if I can think of a second positive thing to say about this approach. :/
Next Up:
I swear I didn’t just waste your time learning something you won’t use, promise. ;)
For one thing this approach is good for particularly sensitive accounts, ones in which you want to be prompted for MFA constantly. Your security logging account for example, or elevated access.
We’re also going to use this model as the foundation of a much more user-friendly, but still very secure, cross-account w/MFA approach. Additionally it’s a model I advocate for EC2 Roles that require cross-account access, such as a Jenkins utility server (only using External ID rather than MFA).
So onward to Part 2!
(Comments and questions will be enabled at the end of this journey on Part 3)